Custom Google Identity Provider
Last updated 01/13/2026
Step 2
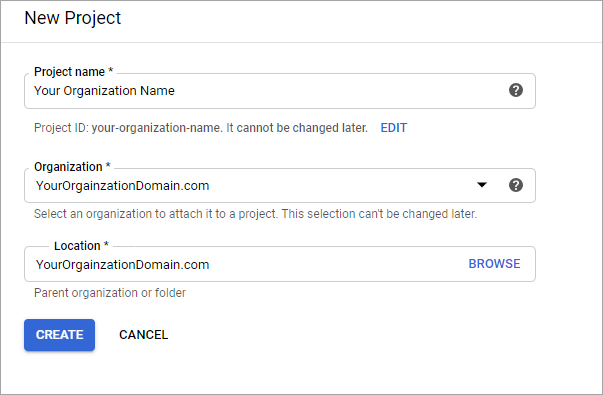
At the top of the page, click Select a Project, then New Project.
Step 3
- For Project name, enter your organization’s name.
- For Organization, select your organization.
- For Location, select your organization.
Click Create
Step 4
At the top of the page, change your project to the one you just created. If it's your first project, it should already be selected.

Step 5
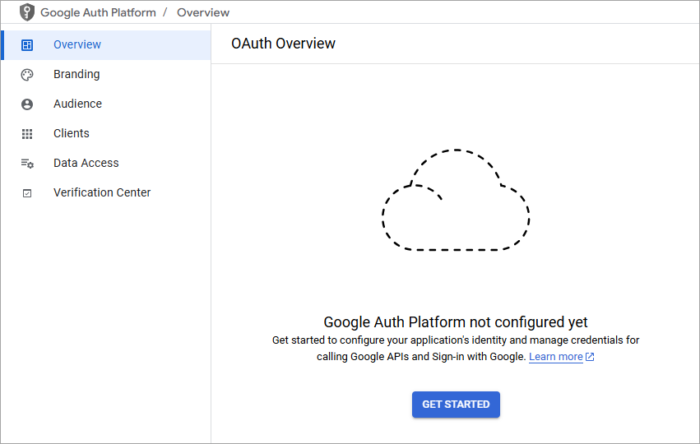
In the left menu (or under Quick access on the page), click on APIs & Services, then OAuth consent screen.
Step 6
Click Get Started to begin the OAuth setup process.
Step 7
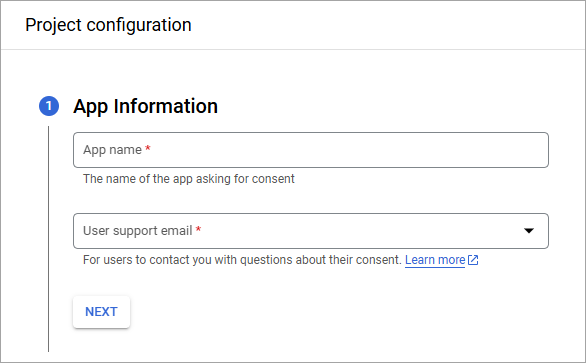
- For Application name, enter your organization’s name.
- For Support email, enter your email address.
- Click Next.
Step 8
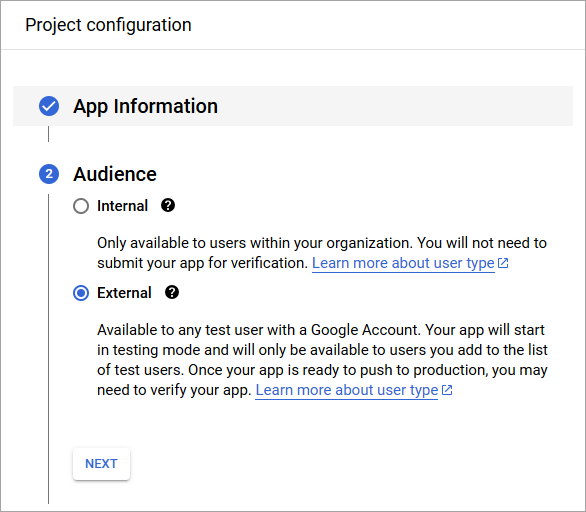
- For Audience, choose External.
- Click Next.
Note: For the Google Social Provider, please ensure that the audience is External. This allows any Google user to authenticate and log in. Internal restricts login to your domain only.
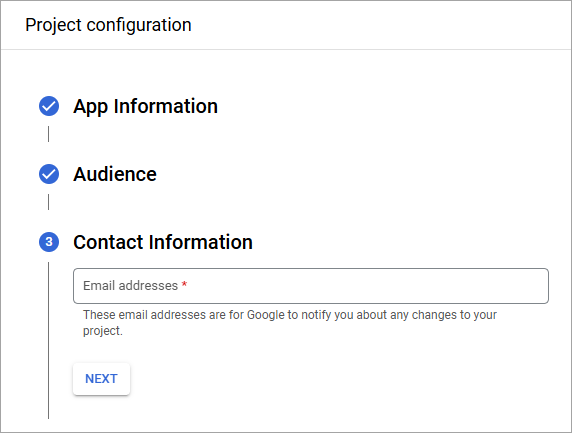
Step 9
Enter your contact email address, then click Next.
Step 10
Review and agree to Google's User Data Policy, then click Continue, then Create.
Step 11
In the left menu, go to Branding, and enter your privacy policy and terms of service links.
Note: Leave the App Logo empty. A custom App Logo will require additional App validation when publishing your App. To add your company logo, please contact Bread & Butter Support after completing the remaining steps.
Step 12
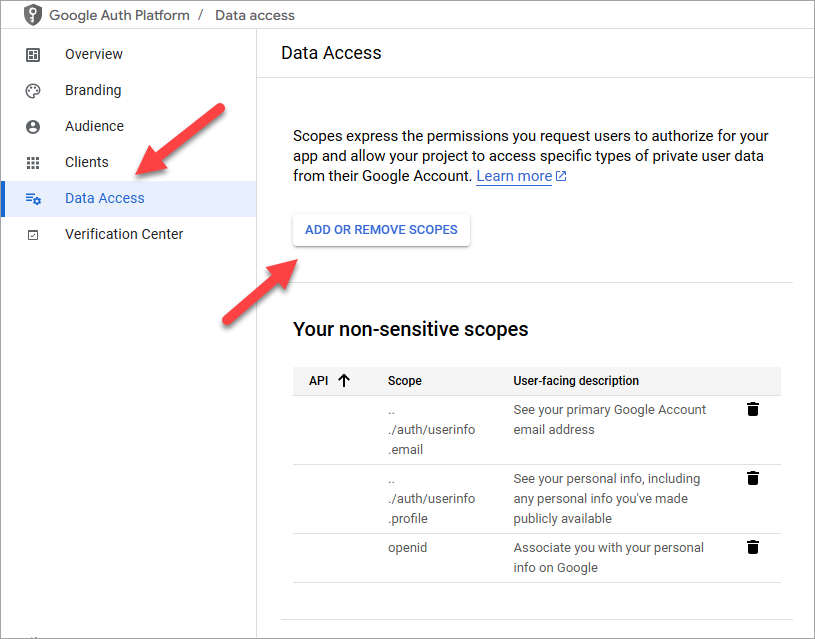
- In the left menu, select Data Access.
- Click Add or Remove Scopes.
- Select or manually add email, profile, and openid to scopes.
- Click Update at the bottom of the side panel, then click Save on the Data Access page.
Step 13
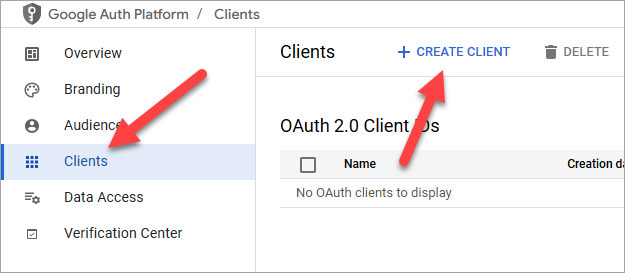
- In the left menu, select Clients.
- Click Create Client.
Step 14
- For Application type, select Web application.
- For Name, enter your app name. We recommend entering your organization name.
- For Authorized redirect URIs, enter:
https://api.breadbutter.io/callback - Click Create.

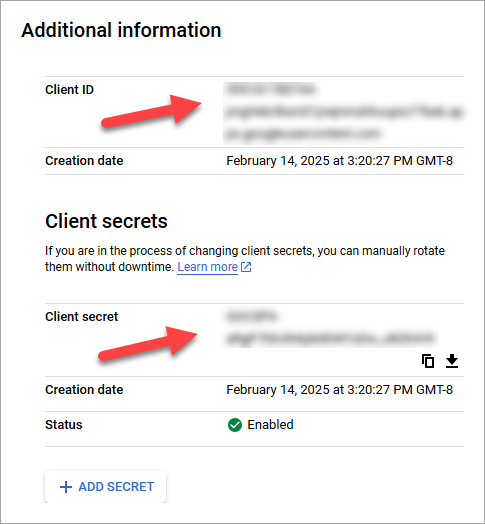
Step 15
Click on the client you just created, and then copy the Client ID and Client Secret for the Bread & Butter setup below.
Step 16
Bread & Butter Setup:
- Go to https://app.breadbutter.io/sign-in/
- Click Sign In and authenticate (or Sign Up make a new account and authenticate).
- Go to Settings in the left menu.
- Click on Google under Conversion & Opt-in Settings > Social Logins.
- Select Set Google for Production.
- Enter a custom name and description.
- Enter the Client ID from the Google setup steps above.
- Enter the Client Secret from the Google setup steps above.
- Click Save.
- Click the checkbox next to your new Google provider to enable it.

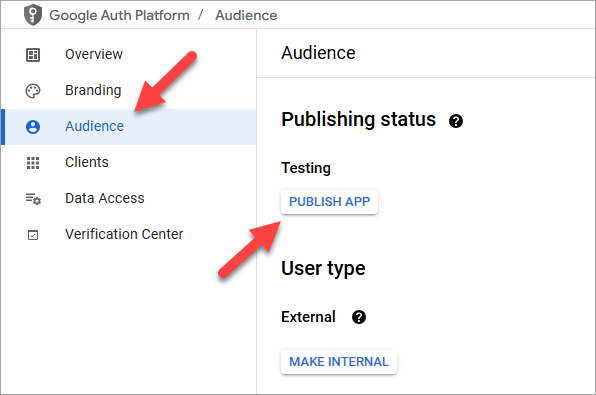
Step 17
- Go back to Google.
- In the left menu, select Audience.
- Click Publish App to make your app available to any user with a Google account.
Step 18
You may still see breadbutter.io on the Google sign in window. To address this, you'll need to complete the Custom Domain Branding Setup
Don’t use Bread & Butter? Want to learn more about how Bread & Butter solves the four biggest problems facing marketers today? Book a demo and see how Bread & Butter is helping marketers make the most of their first-party data


Seeing changes in your match rates? With the end of third-party cookies & new regulations on how data can be shared (GDPR, CCPA or Data Protection Laws), what are you doing to make sure you aren’t caught out?
FUTURE PROOF YOUR DATA - LEARN MOREAdd authentication & API event tracking to your website/app with a script tag & configuration