How To Set Up Your Own Google App (OpenID Connect)
Last updated 05/29/2026
Step 2
At the top of the page, click Select a Project, then New Project, if you have not already created a Project.
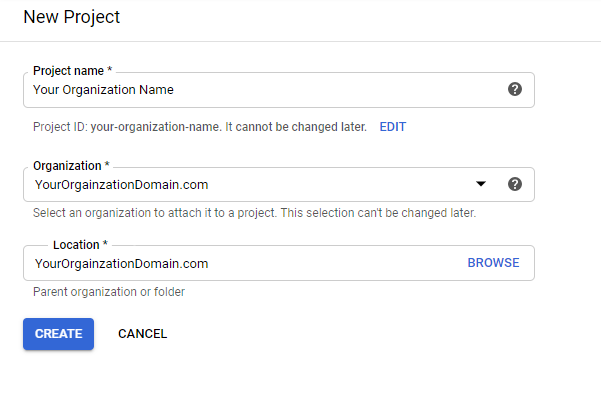
Step 3
- For Project name, enter your organization’s name.
- For Organization, select your organization.
- For Location, select your organization.
Click Create
Step 4
At the top of the page, change your project to the one you just created. If it's your first project, it should already be selected.

Step 5
In the left menu (or under Quick access on the page), click on APIs & Services, then OAuth consent screen.
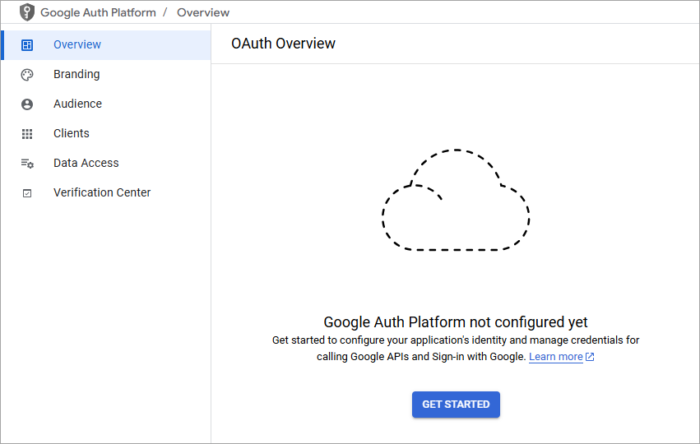
Step 6
Click Get Started to begin the OAuth setup process.
Step 7
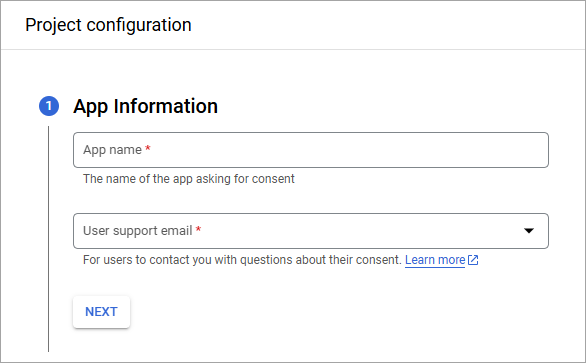
- For Application name, enter your organization’s name.
- For Support email, enter your email address.
- Click Next.
Step 8
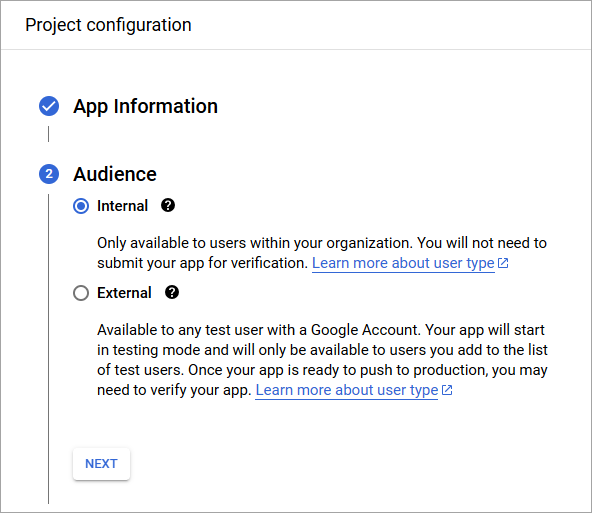
- For Audience, choose Internal.
- Click Next.
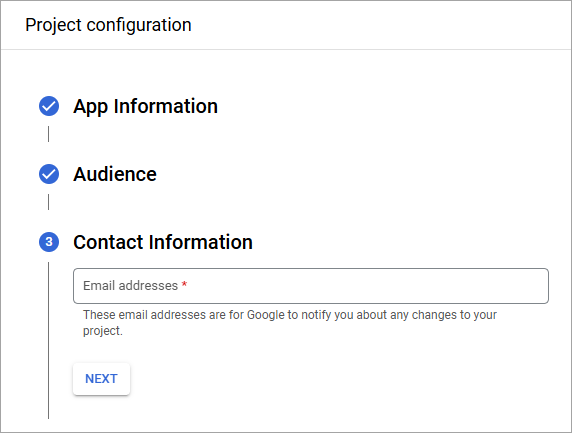
Step 9
Enter your contact email address, then click Next.
Step 10
Review and agree to Google's User Data Policy, then click Continue, then Create.
Step 11
Optional: In the left menu, go to Branding, and enter your privacy policy and terms of service links.
Note: Leave the App Logo empty. A custom App Logo will require additional App validation when publishing your App. To add your company logo, please contact Bread & Butter Support after completing the remaining steps.
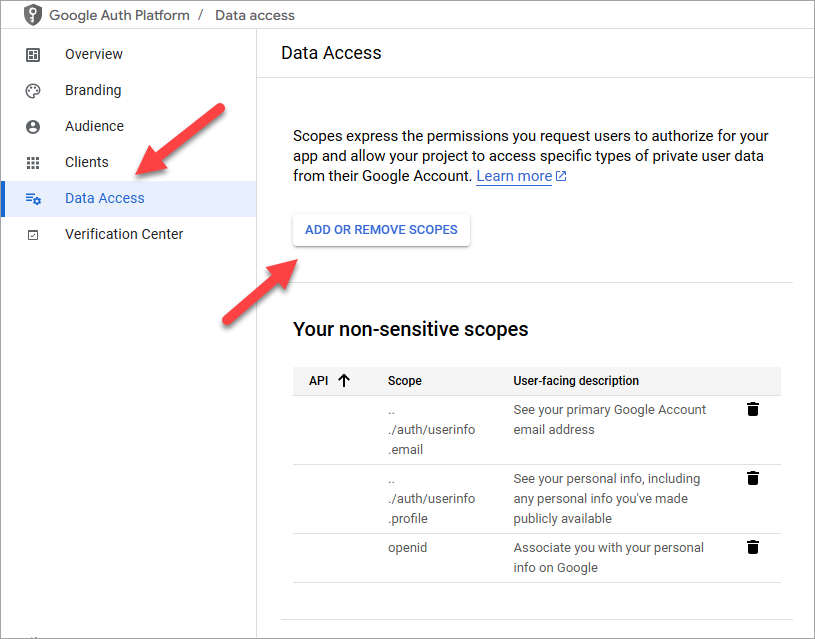
Step 12
- In the left menu, select Data Access.
- Click Add or Remove Scopes.
- Select or manually add email, profile, and openid to scopes.
- Click Update at the bottom of the side panel, then click Save on the Data Access page.
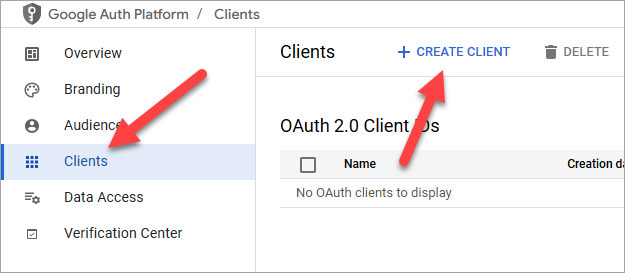
Step 13
- In the left menu, select Clients.
- Click Create Client.
Step 14
- For Application type, select Web application.
- For Name, enter your app name. We recommend entering your organization name.
- For Authorized redirect URIs, enter:
https://api.breadbutter.io/callback - Click Create.

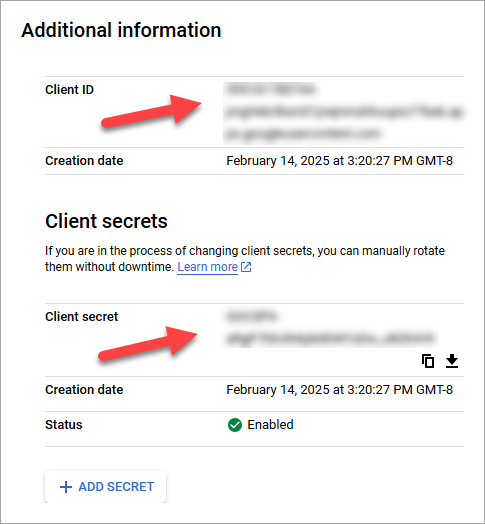
Step 15
Click on the client you just created, and then copy the Client ID and Client Secret for the Bread & Butter setup below.
Step 16
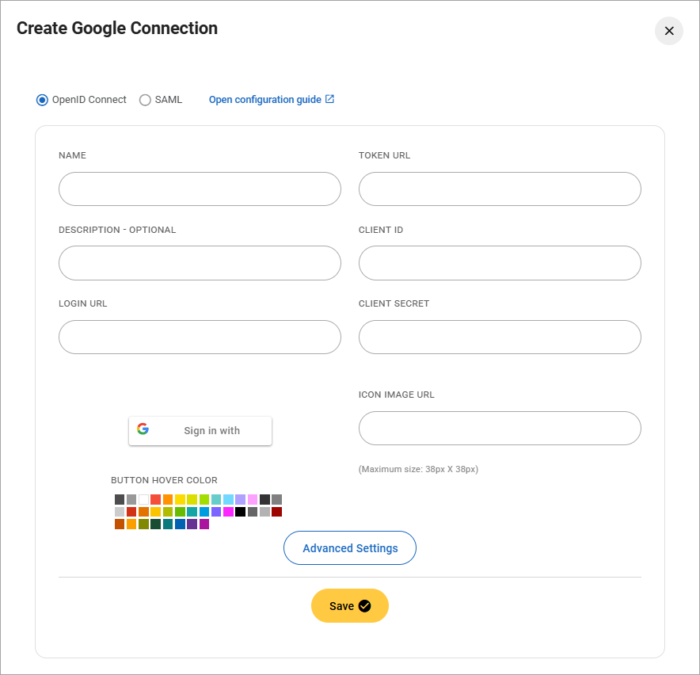
Bread & Butter Setup:
- Go to https://app.breadbutter.io/sign-in/
- Click Sign In and authenticate (or Sign Up make a new account and authenticate).
- Go to Settings in the left menu.
- Click on the Google button under Global Conversion Methods > Enterprise Connections.
- Choose OpenID Connect for the protocol.
- Enter a name.
- Enter a description (optional).
- In the Login URL field, enter:
https://accounts.google.com/o/oauth2/v2/auth - In the Token URL field, enter:
https://oauth2.googleapis.com/token - Enter the Client ID from the Google OAuth setup steps above.
- Enter the Client Secret from the Google OAuth setup steps above.
- Click Save.
- Enable Google by clicking the new entry in the Google Identity Providers list.
Step 17
You may still see breadbutter.io on the Google sign in window. To address this, you'll need to complete the Custom Domain Branding Setup