Custom Facebook Identity Provider
Last updated 03/11/2024
Step 2
Click on My Apps at the top right, then click Create App.
Step 3
Select Authenticate and request data from users with Facebook Login, then click Next.

Step 4
Select No, I'm not building a game, then click Next.

Step 5
- Enter an App Name. We recommend using your company name for the App name, as this name will appear during the login process.
- Ensure that your contact email is correct.
- For Business Account, select your company's business account. Business Account Verification is required to complete this setup process.
- Click Create app.

Step 6
On the Dashboard, click on Customize adding a Facebook Login button.

Step 7
Click Go to settings for Facebook Login.

Step 8
- For the Valid OAuth Redirect URIs, enter:
https://api.breadbutter.io/callback - Click Save Changes.

Step 9
Click Go back at the top right.
Then, in the Permissions section, click Add for email.

Step 10
Click Go back at the top right to return to the main menu.
Step 11
At the bottom of the left menu, go to App Settings, then Basic.

Step 12
Fill out all of the fields on this page that you are able to. This will ensure that your app will be approved by Facebook.
- For App domains enter your website domain.
- Enter your Terms of Service, Privacy policy, and Data Deletion Instructions URLs.
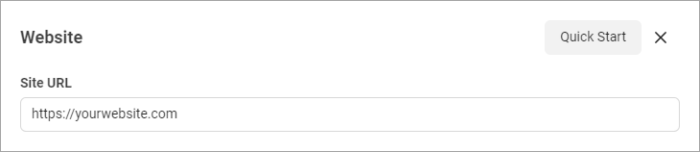
Step 13
- At the bottom of the page, click Add Platform.
- Select Website.
- For Site URL, set this to your website's URL.
- Click Save Changes.
Step 14
Copy and save the App ID and App Secret keys.

Step 15
If you see the Complete Data Use Checkup message at the top of the page, click Get Started, then follow the steps on the page to complete the process.

Step 16
Return to the Dashboard in the left menu, and follow all of the instructions under Step 2 to prepare and submit your app for review.
- For testing, simply view the testing page then go back to the Dashboard.
- For Business Verification follow the steps to verify your business if you have not done so already. Business Verification is required in order to go live.
- For Data handling questions, follow the steps and answer all questions.

Step 17
In the left menu, click Publish, then click the Publish button to set your app to live mode.

Step 18
Bread & Butter Setup:
- Go to https://app.breadbutter.io/sign-in/
- Click Sign In and authenticate (or Sign Up make a new account and authenticate).
- Go to Settings in the left menu.
- Click on Facebook under SSO Settings > Social Accounts.
- Select "Set Facebook for Production".
- Enter a custom name and description.
- Enter the App ID from the Facebook setup steps above.
- Enter the App Secret from the Facebook setup steps above.
- Click Save.
- Click the checkbox next to your new Facebook provider to enable it.

Don’t use Bread & Butter? Want to learn more about how Bread & Butter solves the four biggest problems facing marketers today? Book a demo and see how Bread & Butter is helping marketers make the most of their first-party data


Seeing changes in your match rates? With the end of third-party cookies & new regulations on how data can be shared (GDPR, CCPA or Data Protection Laws), what are you doing to make sure you aren’t caught out?
FUTURE PROOF YOUR DATA - LEARN MOREAdd authentication & API event tracking to your website/app with a script tag & configuration