Webflow: Contact Intelligence on a page
Last updated 01/23/2026
Before adding the Contact Intelligence make sure you have added the initialization script tag.
Contact Intelligence allows you to add a contact us section to one or more pages on your website:
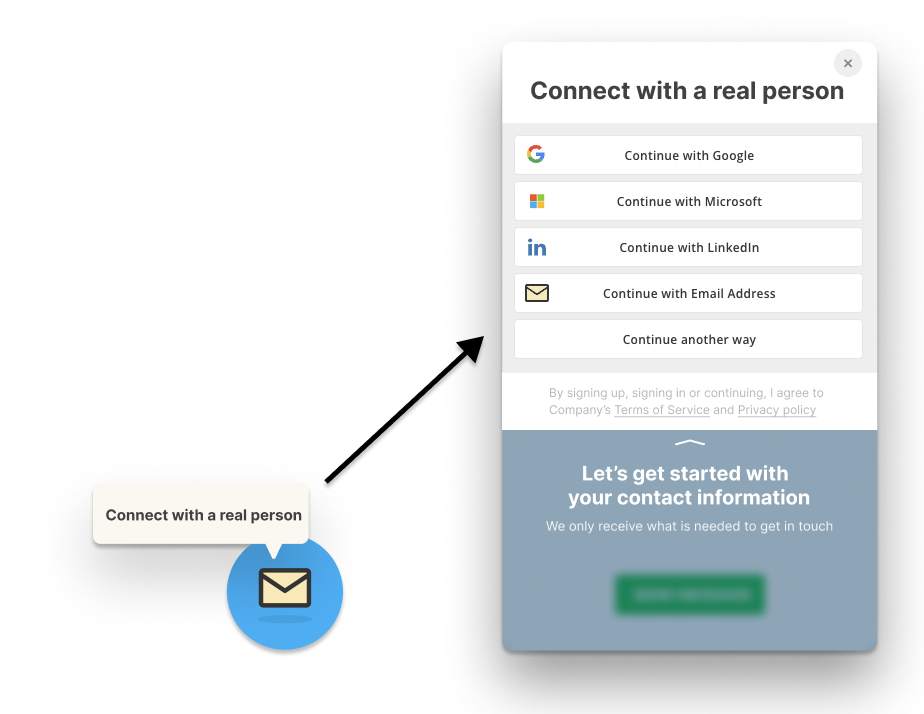
Users are prompted to authenticate first, before they can submit their message. This allows you to convert your users while they are trying to contact you, and ensures that you only receive real requests from real, validated users. Submissions are sent by email to the app owner.
Contact Intelligence is added by placing a Div Block element where you want it, then adding a Bread & Butter script tag. Alternatively, you can also add a floating Contact us tool.
Follow these steps to add Contact Intelligence to your page:
Step 1
Find the location on your page or header where you want to add Contact Intelligence.
Step 2
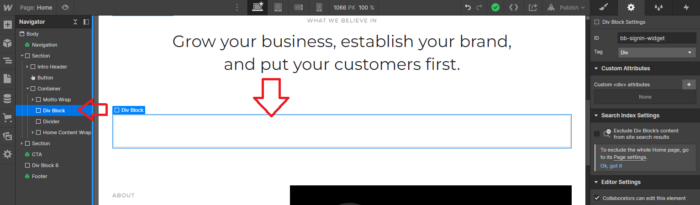
In the Add element menu in the left pane in Webflow, drag a Div Block element to the location you chose in Step 1.
Step 3
Select the Div Block by clicking on it on the page, or by finding it in the Navigator in the left menu.
Step 4
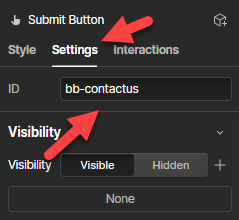
- In the right pane, click on the gear icon to go to Element Settings.
- Then, set the ID to:
bb-contact-us
Note: The element ID is what links the Bread & Butter code to the Div element, so it knows where to put the Login/Logout button.
Feel free to use anything other than bb-profile-widget. Just make sure to change it both in the Div Block ID, and in the Bread & Butter code snippet, so that they remain linked.
Step 5
- In Designer, open Pages in the left nav.
- Hover over Home (or any other page).
- Click the gear icon to open the page settings.

Step 6
Scroll down to the Custom Code section, for the Head tag.

Step 7
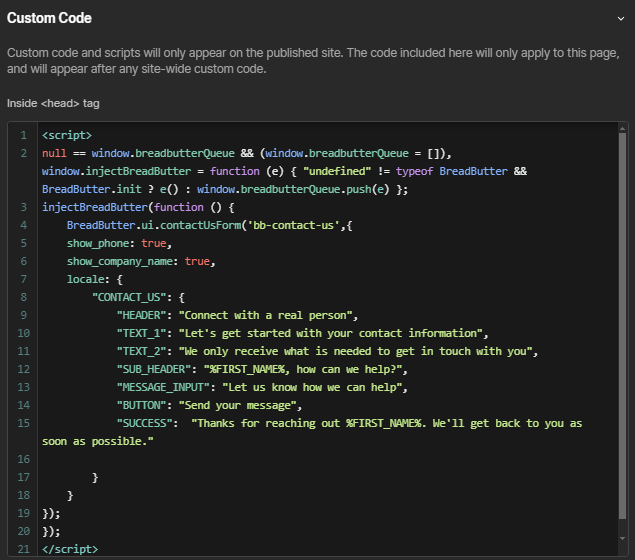
In the Head tag field, paste in the following script tag after the Bread & Butter initialization script tag:
<script>
null == window.breadbutterQueue && (window.breadbutterQueue = []), window.injectBreadButter = function (e) { "undefined" != typeof BreadButter && BreadButter.init ? e() : window.breadbutterQueue.push(e) };
injectBreadButter(function () {
    BreadButter.ui.contactUsForm('bb-contact-us',{
    show_phone: true,
    show_company_name: true,
    locale: {
        "CONTACT_US": {
            "HEADER": "Connect with a real person",
            "TEXT_1": "Let's get started with your contact information",
            "TEXT_2": "We only receive what is needed to get in touch with you",
            "SUB_HEADER": "%FIRST_NAME%, how can we help?",
            "MESSAGE_INPUT": "Let us know how we can help",
            "BUTTON": "Send your message",
            "SUCCESS":  "Thanks for reaching out %FIRST_NAME%. We'll get back to you as soon as possible."

        }
    }
});
});
</script>
Note: If you have other Bread & Butter feature snippets, just add this snippet below them.
Step 8
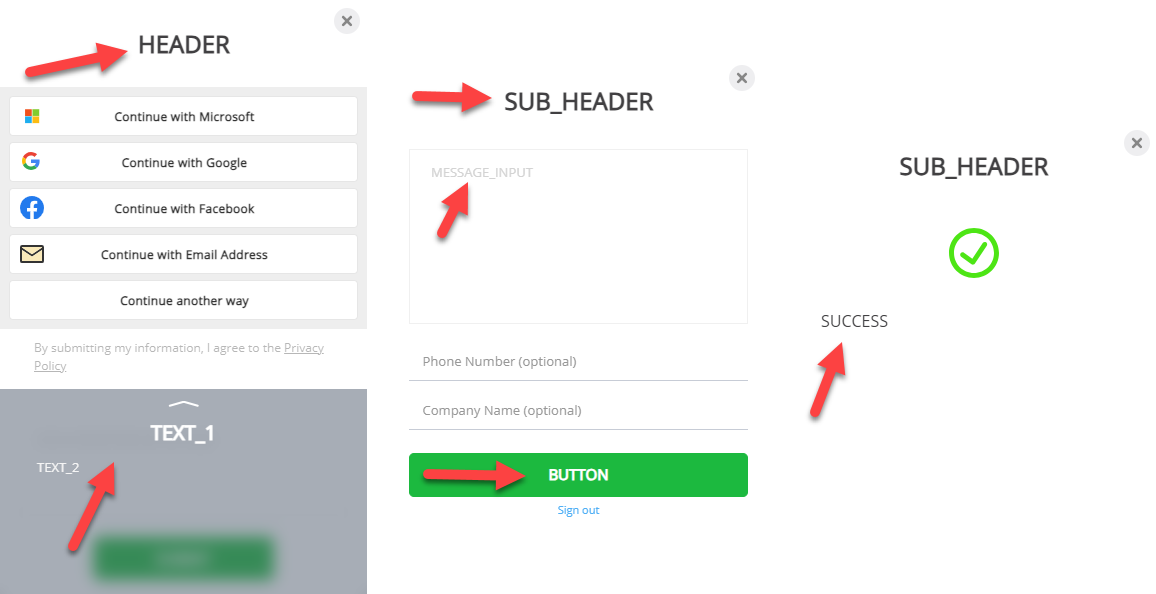
The following content can be configured to suit your specific requirements (see screenshot):
- show_phone: Show the "Phone" field on the contact us form.
- show_company: Show the "Company Name" field on the contact us form.
- For the position, you can set an edge and the number of pixels in from that edge.
- For the locale fields, see below for the text locations. You can add the %FIRST_NAME% parameter to the SUB_HEADER, BUTTON, or SUCCESS fields, but not the other fields.
- Note: Each parameter in the locale file has default text, so you don't need to specify them here if you don't want to.
Step 9
- Click Save Changes.
- Publish your website, when ready.