WordPress Plugin Installation
Last updated 3/31/2025
Installing and setting up the Bread & Butter WordPress Plugin is quick and easy. On completion of these steps, you’ll be ready to use Bread & Butter. Simply follow the steps below.
Step 1
Log in to your WordPress admin panel as an Administrator.
Step 2
- Go to Plugins on the left side menu, then click the Add New Plugin button at the top.
- Search plugins for “bread & butter”.
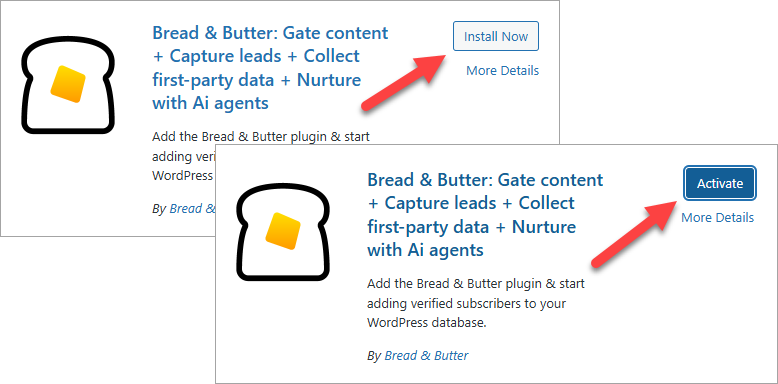
- Click Install Now for the Bread & Butter plugin.
- Once installed, click Activate and you will be taken directly to the setup tab.

Step 3
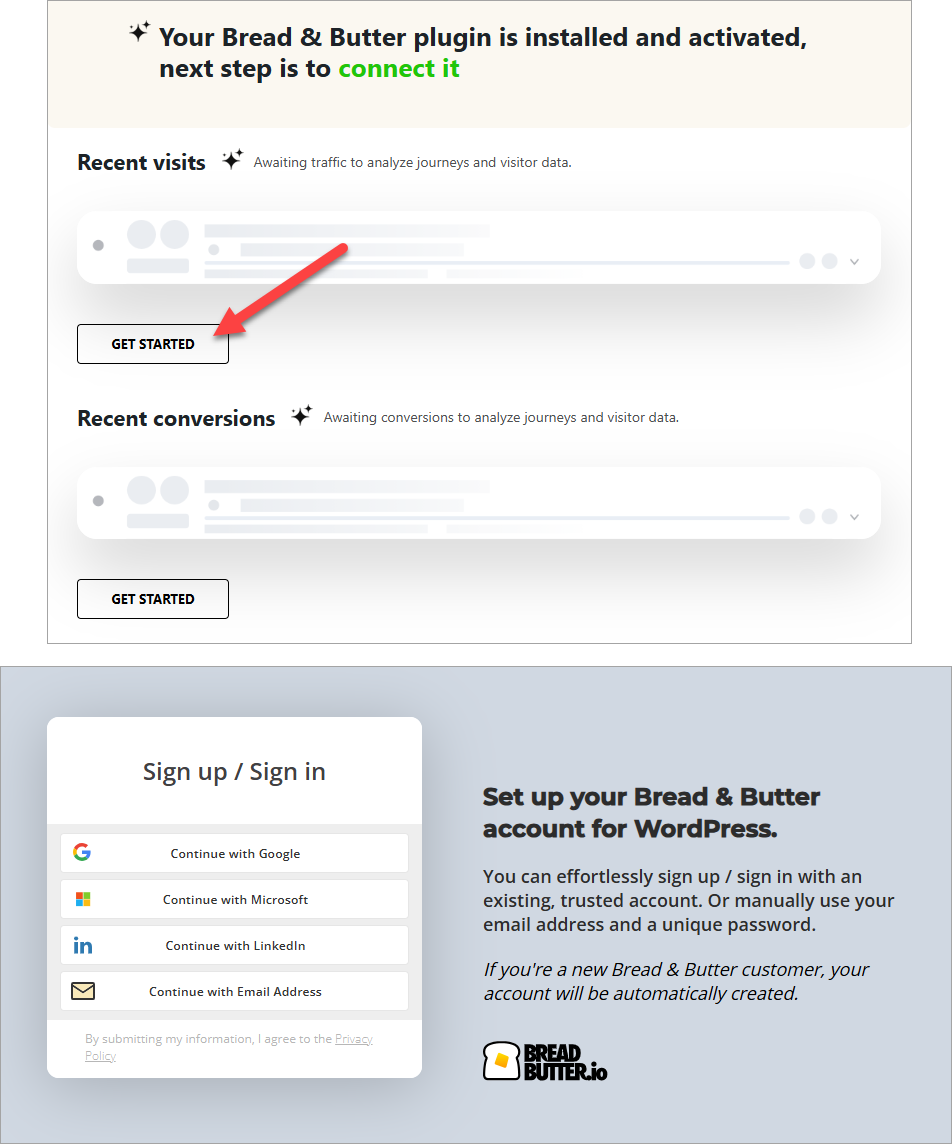
On the Dashboard page, click Get Started to begin the setup process.
A popup will appear where you can choose to create an account with your email address and password, or log in with Google or any of the other listed sign in methods.

Step 4
If you’re a new Bread & Butter customer, your account will be automatically created. Please skip to Step 5.
If you are an existing Bread & Butter customer, you may see a screen where you can choose an existing app, or create a new one.
- If you want to create a brand new app for your website, click Create New App for your WordPress website
- If you want your website connected to an existing app, see WordPress Plugin – Advanced Setup.
The app is created, and you are taken to the Dashboard page, where you’ll see that the setup was successful.

Step 5
Congratulations! Your WordPress website is now set up with your new Bread & Butter app.
You can see a few of your visitors right in WordPress, or you can click the View More to see all of your visitors in our web view.
Note: If you don’t see any activity in the Bread & Butter Dashboard, try going to your website’s homepage. You should then see your visit appear in your Bread & Butter & Butter Dashboard after you refresh the page.
If you do not see your users’ page visits on the Dashboard, please don’t hesitate to contact us at support@breadbutter.io.
Step 6
Now you’re ready to enable conversion tools on your website:

